Krka National Park Croatia: Waterfalls, Swimming & Complete Visitor Guide
Complete guide to Krka National Park in Croatia — discover Skradinski Buk and Roški Slap waterfalls, can you swim at Krka, best time to visit, entrance fees, trails, and tips for planning your trip to one of Croatia's most beautiful national parks.
November 22, 2023 · 32 min read
Click here for all chapters: Discover Croatia: Budget Adventures & Hidden GemsKrka Waterfalls Photography Guide: Mastering Croatia’s Most Accessible Waterfalls
I still remember my first photography visit to Krka. July, 11:00 AM, excited to shoot the famous Skradinski Buk waterfalls. What I walked into was wall-to-wall tourists, harsh midday sun blowing out the white cascades and every composition filled with dozens of people. After six years living in Croatia and returning to Krka in all seasons, I’ve learned that waterfall photography here needs three things: smart timing, long exposure technique and a plan for the crowds.
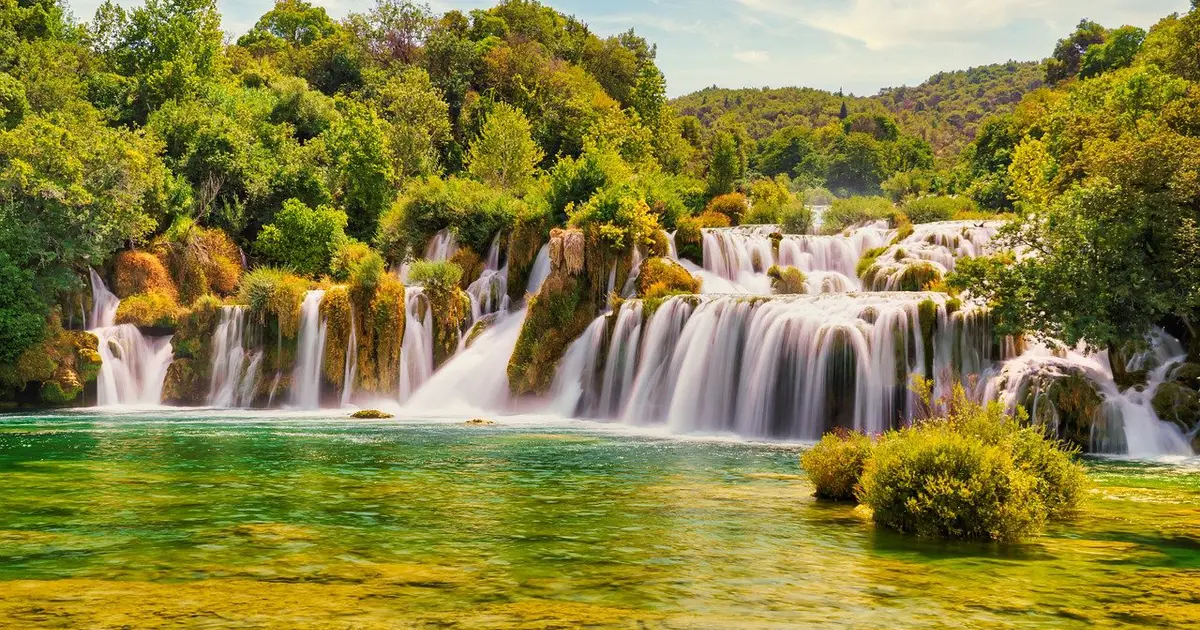
Krka sits in Šibenik-Knin County and holds some of Croatia’s most accessible waterfalls. The crown jewel, Skradinski Buk, runs 17 cascades over 800 meters with a total drop of 45.7 meters, one of Europe’s great travertine complexes. Unlike remote wilderness falls that demand long hikes, Krka’s boardwalks put you at water level, meters from the cascades. That close access is rare at major waterfall destinations.
In this guide I’ll share what I’ve learned: the best times and locations, camera settings and long exposure technique, how to use ND filters, composition strategies, working around crowds and boardwalk limits and how the seasons transform the park.
Table of Contents
- Understanding Krka’s Waterfall Complex
- Essential Gear for Waterfall Photography
- Camera Settings and Long Exposure Technique
- Best Photography Locations
- Composition Techniques for Waterfalls
- Best Times and Seasons
- Managing Crowds and Boardwalk Challenges
- Post-Processing Waterfall Images
- Practical Information
- FAQ
Understanding Krka’s Waterfall Complex
Krka National Park covers 109 square kilometers along the Krka River, but most photography happens at two waterfalls: Skradinski Buk and Roški Slap.
Skradinski Buk: The Main Attraction
Skradinski Buk is Croatia’s most photographed waterfall, a travertine cascade system among the finest in Europe. It is not a single drop. It’s a complex of 17 cascades stretched over 800 meters, a sequence of falls, pools and channels.
The cascades range from gentle 1-meter curtain falls to powerful 8-meter drops. Plenty of variety in a small area. The travertine (calcium carbonate) formations build natural barriers, pools and channels that shape how the water moves, giving you endless photographic subjects.
The circular boardwalk trail (1.9 kilometers) loops 360 degrees around the complex. Walk it and the perspective keeps shifting, sometimes you’re at the base looking up, other times above a fall looking down, often mid-level across several cascade tiers. This variety is what makes Skradinski Buk so good for photography.
The travertine itself gives the place its character. Golden-brown calcium deposits build sculptural forms that direct water into patterns. The barriers step down into terraced pools. Porous travertine lets water seep through in delicate curtains. There’s more to work with here than at a simple rock waterfall.
Roški Slap: The Quieter Alternative
Roški Slap sits upstream from Skradinski Buk and offers strong waterfall photography with far fewer crowds. The main cascade drops 22.5 meters alongside many smaller falls, stretching into a 450-meter complex.
What sets Roški Slap apart is the cultural layer. Traditional stone watermills sit beside the cascades, their weathered stone contrasting with the flowing water. You can compose shots here that purely natural waterfalls don’t offer.
Roški Slap gets maybe 20% of Skradinski Buk’s visitor numbers. Ideal if you want solitude and easier boardwalk access for tripod work.
The Krka River and Canyon
Between the waterfalls the Krka runs through a limestone canyon with calm sections that work well for reflection shots. The turquoise-blue water (colored by dissolved minerals) contrasts nicely with green vegetation and white limestone cliffs.
Boat trips reach Visovac Island with its 14th-century monastery, and canyon viewpoints give you elevated angles you can’t get from the water-level boardwalks.
Travertine Dynamics
Understanding how travertine forms will sharpen your photography. The Krka carries a lot of dissolved calcium carbonate. As water flows over obstacles, carbon dioxide releases and calcium carbonate precipitates, slowly building travertine deposits.
So Krka’s waterfalls are living, growing formations. Barriers expand, pools shift, channels change over the years. What you photograph today will look subtly different on a future visit.
This also explains the golden-brown color. Minerals and organic material stain the travertine. Fresh travertine is almost white, but weathering builds the warm tones that photograph so well.
Essential Gear for Waterfall Photography
Waterfall photography at Krka needs specific gear beyond a basic camera and lens.
Camera Body
Any DSLR or mirrorless camera with manual exposure control will work. What matters:
Long exposure capability: The ability to use exposure times of several seconds.
RAW format: Essential for capturing the dynamic range between bright white cascades and shadowed forest.
Live view: Helps with precise composition and focus when the camera is on a tripod.
Weather sealing is useful given the spray, though careful technique can protect non-sealed cameras.
Lenses
Wide-angle (16-35mm): Essential for capturing the full scope of multi-tier cascades and showing how waterfalls relate to surrounding terrain. At Krka’s boardwalks, wide angles let you include foreground elements (pools, travertine) while still showing the waterfalls behind.
Standard zoom (24-70mm): The most versatile choice. Works for individual cascades, medium compositions and detailed sections. If you bring only one lens, this is it.
Telephoto (70-200mm): Excellent for isolating cascade details, building abstract water patterns and shooting sections of waterfalls when crowds block close boardwalk access.
Tripod
A sturdy tripod is mandatory for long exposure waterfall photography. What to look for:
Stability: Must hold your camera without vibration during multi-second exposures.
Height range: Should extend tall enough for eye-level shooting but also go low for water-level perspectives.
Secure feet: The wooden boardwalks get slippery when wet. Rubber feet work better than spiked feet on wood.
Weight: You’ll carry it 2+ kilometers around the boardwalk loop. A balance between stability and weight is ideal.
I use a carbon fiber tripod. The weight savings on the long walk is worth it, and it holds steady.
ND Filters
Neutral density filters are essential for daytime waterfall photography.
6-stop ND filter: Allows 1-4 second exposures in moderately bright conditions (shaded forest areas, morning or evening light).
10-stop ND filter: Enables very long exposures (15-60 seconds) even in bright midday conditions.
I carry both and use them individually or stacked depending on the light. Some photographers prefer a 3-stop and a 6-stop which combine for 9-stops.
Circular screw-on filters are more convenient than square filter systems for Krka’s mobile boardwalk photography. Get filters sized for your largest lens diameter and use step-up rings for smaller lenses.
Variable ND filters are convenient but can introduce color casts and “X” patterns with wide-angle lenses. I prefer fixed ND filters for best image quality.
Circular Polarizing Filter
A polarizer does several jobs at once:
Reduces water surface reflections: Lets you see through the surface to underlying rocks and travertine.
Saturates colors: Enhances the green vegetation and blue water.
Cuts 1-2 stops of light: Can sometimes substitute for a weak ND filter.
Be careful stacking a polarizer with ND filters, the combination can vignette, especially with wide-angle lenses.
Remote Shutter Release
A cable release or wireless remote trigger eliminates camera shake from pressing the shutter button during long exposures. No remote? Use the camera’s 2-second self-timer.
Lens Cleaning Supplies
Water spray is inevitable at Krka. Bring:
- Multiple microfiber cloths
- Lens cleaning solution
- Rocket blower for removing water droplets
Keep a microfiber cloth where you can grab it quickly to wipe spray off the front element between shots.
Camera Protection
You’ll hit spray near the waterfalls. Protection options:
Lens hood: Gives some protection from angled spray and cuts flare.
Rain cover: Simple shower cap or dedicated rain cover for heavy spray areas.
UV filter: A cheap filter protects your expensive front element from water damage.
I keep a microfiber cloth draped over my camera between shots, ready to wipe down any spray that lands on equipment.
Recommended Minimal Setup
If weight and cost are concerns, the minimal effective setup is:
- Camera with manual controls and RAW capability
- 24-70mm lens (or similar standard zoom)
- Sturdy tripod
- 6-stop ND filter
- Remote shutter release or use 2-second timer
- Microfiber cloth
This setup can produce excellent waterfall images at Krka.
Camera Settings and Long Exposure Technique
At Krka, waterfall photography is mostly long exposure work, the classic silky flowing water look.
Aperture Settings
f/11 to f/16: My standard aperture range for waterfall scenes. This gives depth of field that keeps both foreground elements (pools, travertine) and background cascades sharp.
At f/11 with a 24mm lens, hyperfocal distance is about 2 meters, so sharpness runs from 1 meter to infinity. That’s ideal for Krka’s boardwalks where you’re often composing with close foreground elements.
f/16 gives maximum depth of field but pushes into diffraction territory, reducing overall sharpness slightly. I use f/16 only when I have extremely close foreground elements that need extra depth.
Avoid wide apertures (f/2.8 to f/5.6) for waterfall scenes. The shallow depth of field makes it hard to keep the entire cascade sharp.
Shutter Speed for Silky Water
Shutter speed controls how water motion appears:
0.5 to 1 second: Slight smoothing while keeping some water texture and detail. Good for showing the water’s movement while maintaining structure.
1 to 4 seconds: The classic silky water effect. Water goes smooth and flowing while keeping some form and direction. My standard range for Krka’s cascades.
4 to 15 seconds: Very smooth, ethereal water. The cascades turn into soft, misty curtains. Beautiful for artistic work.
15+ seconds: Extremely smooth, almost cloud-like water. Can lose too much detail and impact. I rarely shoot this long for waterfalls.
There’s no “correct” shutter speed, it’s artistic preference. Experiment to see what you like. I usually shoot the same composition at 1s, 2s and 4s, then pick the best during editing.
ISO Settings
Use the lowest ISO possible (typically ISO 100) for maximum image quality, minimal noise and best dynamic range. The whole point of ND filters is to allow long exposures at low ISO even in bright conditions.
Only bump ISO if you need faster shutter speeds for creative reasons while still using ND filters.
ND Filter Technique
The workflow for using ND filters:
Compose and focus with the ND filter removed (it’s too dark to see through strong ND filters).
Switch to manual focus so the focus doesn’t change when you attach the filter.
Meter the exposure without the ND filter. Note the settings (e.g., 1/125s, f/11, ISO 100).
Calculate the new exposure with the ND filter. For a 6-stop ND, 1/125s becomes 2 seconds. For a 10-stop ND, 1/125s becomes 4 seconds. Use an ND filter calculator app, faster and more accurate than mental math.
Attach the ND filter carefully without bumping the camera or changing focus.
Set the new shutter speed (in Manual mode or Bulb mode for exposures longer than 30 seconds).
Cover the viewfinder to prevent light leaks during exposure (use the built-in eyepiece cover or a piece of dark cloth).
Trigger the shutter using a remote release or 2-second timer to avoid camera shake.
Review the result and adjust exposure as needed. Even with calculator apps, you often need to fine-tune based on the histogram and image review.
Exposure Considerations
Krka’s waterfalls create tricky exposure scenarios:
Bright white cascades can easily blow out to pure white with no detail.
Dark shadowed forest around the boardwalks adds extreme contrast.
Travertine formations are mid-tone, so they make a good exposure reference.
My approach: Expose to protect the waterfall highlights, keeping the histogram off the right edge (blown highlights). You can recover shadowed areas from RAW files in post, but blown highlights are gone.
I typically underexpose by -0.3 to -0.7 EV from what the camera meter suggests, then check the histogram. If highlights are preserved, I can lift shadows in processing.
Alternatively, bracket exposures (-1, 0, +1 EV) and blend in post-processing for full dynamic range control.
Recommended Settings Summary
Standard Long Exposure Waterfall:
- Mode: Manual
- Aperture: f/11 to f/16
- Shutter Speed: 1-4 seconds (using ND filter)
- ISO: 100
- White Balance: Daylight (5500K) or Auto (shooting RAW)
- Format: RAW
- Stabilization: Off (on tripod)
- Mirror Lockup: Enabled if available
- Remote Release: Used or 2-second timer
Best Photography Locations
Krka offers multiple waterfall photography locations, each with its own character.
Skradinski Buk Main Cascades
The primary waterfall complex offers hundreds of compositions. Key areas:
Lower Cascades (near entrance): The first waterfalls you hit after entering. Powerful central cascade with multiple channels. This area gets the most crowded but offers strong compositions of the main drop.
Photography: Use wide-angle lenses (16-24mm) to show the full height and width. Long exposures (2-4s) smooth the powerful flow nicely. Morning light hits these cascades well.
Middle Section: Several medium-sized cascades with intricate travertine pools and channels. Less crowded than the entrance area.
Photography: Standard zoom range (35-70mm) works perfectly. Focus on individual cascades or small groups. The travertine pools in the foreground build leading lines toward the background waterfalls.
Upper Cascades: Gentler, wider curtain falls with less power but more delicate character. Often the quietest section.
Photography: Telephoto lenses (100-200mm) can isolate curtain fall sections for abstract images. The gentle flow needs longer exposures (4-8s) for the smooth effect.
Viewpoint Overlook: Elevated wooden platform above the main cascades with an overview perspective.
Photography: The only aerial view of the entire cascade complex. Use wide-angle lenses to show the full 800-meter waterfall layout. Midday top-lighting actually works better here than elsewhere in the park.
Roški Slap Waterfalls
The second major waterfall area offers different subjects:
Main Drop: 22.5-meter cascade with powerful flow.
Photography: Shoot from the base looking up to emphasize height or from the side to show the full drop. Morning light works best. Long exposures (2-4s) create dramatic motion blur in the powerful flow.
Watermill Area: Traditional stone mills beside smaller cascades.
Photography: Compose to include both cultural and natural elements. The weathered stone mills contrast well with the flowing water. Use aperture priority (f/11) and let shutter speed adjust to the light, aiming for 1-4 second exposures.
Forest Cascades: Smaller falls surrounded by dense forest.
Photography: The dappled forest light builds beautiful green tones. Overcast conditions work well here. Focus on intimate details rather than grand vistas.
Visovac Island Monastery
The monastery on an island in Krka’s lake section offers different photography:
From Boat: Approaching by boat gives water-level views of the monastery with reflections.
Photography: Morning offers calm water and good light. Use telephoto lenses (70-200mm) to compress perspective and isolate the monastery against the mountains.
Monastery Grounds: From the island, you can photograph the surrounding lake and canyon.
Photography: Use the monastery architecture to frame natural areas. Evening light creates warm tones on the stone building.
Krka Canyon Viewpoints
Several viewpoints offer elevated perspectives over the river canyon:
Canyon Overlooks: Show the turquoise river winding through limestone cliffs.
Photography: Use standard to telephoto lenses (50-200mm) to compress the canyon layers. Morning or late afternoon side-lighting creates depth and dimension.
Composition Techniques for Waterfalls
Strong composition is what turns ordinary waterfall shots into compelling images.
Foreground Elements
Empty waterfalls can feel flat. Add foreground interest to build depth:
- Travertine pools: The golden pools in front of cascades make strong leading elements.
- Rocks and formations: Use travertine barriers and rocks as foreground anchors.
- Vegetation: Overhanging branches or riverside plants frame waterfalls.
- Boardwalk elements: Occasionally include parts of the wooden walkway to show the human experience.
Use wide-angle lenses (16-24mm) with f/11 to f/16 to keep both close foreground and distant waterfall sharp.
Leading Lines
Waterfalls build natural leading lines:
- Water channels: Streams leading to cascade drops guide the eye.
- Cascade tiers: Multiple waterfall levels build vertical leading lines.
- Travertine barriers: The horizontal and diagonal lines of travertine formations direct attention.
- Boardwalk rails: The wooden railings can serve as leading lines when included.
Position yourself so these lines lead toward your focal point (usually the main cascade).
Layering and Depth
Build three-dimensional feel through layering:
- Foreground: Pools, rocks or vegetation
- Midground: Primary waterfall cascades
- Background: Upper cascades or forest
This creates depth that pulls viewers into the image.
Vertical vs. Horizontal Orientation
Waterfalls are often vertical subjects, but both orientations work:
Vertical/Portrait: Emphasizes the waterfall’s height and power. Works well for single tall cascades or when including foreground pools leading to background falls.
Horizontal/Terrain: Shows the width and context of cascade complexes. Better for multi-tier scenes or when including the surrounding environment.
I typically shoot both orientations, then choose during editing.
Rule of Thirds
Place primary cascades or focal points along thirds intersections rather than dead center. This makes for more dynamic compositions than centered waterfalls.
That said, symmetrical cascades sometimes work better centered. Know the rule, then break it when the image calls for it.
Isolating Details
Not every image must show the full waterfall. Telephoto lenses let you isolate:
- Abstract water patterns: Close-up of flowing water building graphic patterns
- Single cascade sections: One beautiful fall rather than the entire complex
- Water and travertine interaction: Details of water flowing over golden formations
These detailed images complement wide scenic shots.
Long Exposure Creative Effects
Experiment with different shutter speeds for varied effects:
- Very short (1/500s): Freeze every water droplet for an energetic, dynamic feel
- Moderate (1/4s): Some smoothing while keeping water structure
- Standard (1-4s): The classic silky appearance
- Very long (15-30s): Ethereal, almost cloud-like water
The same cascade transforms completely with different exposure times.
Best Times and Seasons
Timing makes a huge difference at Krka. Get it wrong and you’ll fight crowds and harsh light. Get it right and the park opens up.
Daily Timing
Early Morning (8:00-10:00 AM): The best time for waterfall photography at Krka.
Benefits:
- Nearly empty boardwalks during first 90 minutes
- Soft morning light filtering through forest canopy
- Calm air (important for long exposures)
- Cooler temperatures
- Clear water without disturbed sediment
This is my preferred shooting window. I arrive at park opening and work quickly through my shot list before crowds build.
Midday (11:00 AM-2:00 PM): The most challenging time.
Challenges:
- Peak crowds making boardwalk photography difficult
- Harsh overhead sun creating extreme contrast
- Hot temperatures
- Many visitors disturbing the water
I generally avoid serious photography during these hours and use the time for scouting or lunch.
Late Afternoon (4:00-6:00 PM): Second-best time.
Benefits:
- Thinning crowds as people leave
- Warm afternoon light creating golden tones
- Lower temperatures
Challenges:
- Water may be cloudy from the day’s visitors
- Shorter shooting window before park closing
Golden Hour: The hour before sunset gives beautiful warm light, though the forest canopy blocks direct golden light in many areas. The elevated viewpoint overlook gets nice evening light.
Seasonal Variations
Spring (April-May): Excellent Photography Season
Benefits:
- Highest water levels from snowmelt and spring rains
- Powerful waterfall flows
- Green vegetation and wildflowers
- Moderate crowds
- Good weather
Challenges:
- Water can be muddy after heavy rains
- Weather more unpredictable
Spring delivers dramatic, powerful waterfalls with strong flow.
Summer (June-August): Peak Season
Benefits:
- Reliable sunny weather
- Long daylight hours
- Full park access and facilities
Challenges:
- Extreme crowds (thousands of visitors daily)
- Lower water levels
- Heat
Summer needs very early arrival for crowd management. Water levels are lower, which reveals more travertine structure.
Fall (September-October): Excellent Season
Benefits:
- Moderate crowds (September still busy, October much quieter)
- Beautiful autumn colors
- Good water levels after summer low
- Pleasant temperatures
Challenges:
- Shorter days than summer
- October weather more variable
Fall is my favorite season for Krka, good conditions with reasonable crowds.
Winter (November-March): Off-Season
Benefits:
- Completely empty park
- Unique winter character
- Lower water reveals travertine structure
- Different light and mood
Challenges:
- Some trails may be closed
- Very low water levels
- Cold temperatures
- Shorter days
Winter offers completely different photography. Low water flow creates delicate curtains over exposed travertine, and the empty park lets you shoot freely.
Water Level Considerations
Krka’s waterfalls change dramatically with water levels:
High Water (Spring): Powerful flows, white cascades, dramatic motion. The travertine is mostly covered by water.
Medium Water (Fall): Balanced flows showing both water power and travertine structure. Ideal for photography.
Low Water (Summer/Winter): Delicate flows revealing intricate travertine formations. Different but equally good photography.
Each water level offers unique opportunities rather than “better” or “worse” conditions.
Managing Crowds and Boardwalk Challenges

Krka is one of Croatia’s most visited parks. Managing crowds is essential for photography success.
Arrival Timing Strategy
Arrive at opening (8:00 AM in summer, varies by season): The single most important strategy. The first 60-90 minutes offer nearly empty conditions.
Park in the main lot near Skradinski Buk entrance: Other entrances may be farther from the waterfalls.
Go directly to your priority compositions: Work efficiently during the quiet morning window.
Crowd Elimination Techniques
Long exposures: 30-60 second exposures (using 10-stop ND filter) render moving people as transparent ghosts or erase them entirely. People who stop to watch your photography will appear, but those walking through disappear.
Patience: Identify your composition, set up and wait for gaps in the crowd flow. Tour groups move together, creating brief quiet windows between groups.
Explore the full loop: Most visitors cluster at the entrance area and first viewpoints. Walk the entire 1.9km boardwalk loop, later sections have fewer people.
Visit Roški Slap: If Skradinski Buk is too crowded, Roški Slap offers excellent waterfall photography with minimal crowds.
Boardwalk Photography Techniques
Krka’s wooden boardwalks present unique challenges:
Vibration: Walking visitors send boardwalk vibration through your camera during long exposures. Wait for quiet moments between groups before triggering.
Narrow walkways: In some sections, the boardwalk is narrow (1.5m width). Be courteous to other visitors, don’t block the entire walkway with your tripod setup.
Tripod stability: Use a wide tripod stance on the wooden surface. Rubber feet work better than spikes.
Keep moving: Set up, shoot your composition (multiple exposures if bracketing), then move on. Don’t monopolize prime spots during busy times.
Spray on boardwalks: Some sections of boardwalk get wet from spray. Watch your footing and protect gear from water on the wooden surface.
Working with People in Frame
When crowds are unavoidable, consider including people as compositional elements:
- Provide scale: A small human figure shows the waterfall’s size
- Add color: Bright clothing creates color contrast against green forest and white water
- Show experience: Captures how people interact with this dramatic place
Sometimes the crowded reality of popular destinations is part of the story worth documenting.
Post-Processing Waterfall Images
Post-processing completes the waterfall photography workflow.
RAW Processing Basics
Exposure: Fine-tune overall brightness. I often lift shadows to recover detail in dark forest areas while protecting waterfall highlights.
Highlights and Whites: Pull down to recover any blown waterfall highlights. The goal is texture in the white water, not pure white.
Shadows and Blacks: Lift to reveal detail in shadowed forest and travertine areas.
Contrast: Slightly reduce global contrast to manage the extreme range between bright water and dark forest, then add back local contrast with clarity.
Clarity: A moderate increase (+10 to +20) brings out texture in travertine and vegetation without over-processing.
Vibrance: Increase vibrance (+10 to +30) to enhance the green vegetation and golden travertine without over-saturating.
Color Temperature: Adjust white balance so water and travertine tones render accurately. Krka’s water has a slight blue-green tint.
Graduated Filters
Use digital graduated filters (in Lightroom or Photoshop) to balance bright and dark areas:
- Darken sky/bright areas: Pull down exposure in the upper portion if bright sky is visible
- Lighten foreground: Increase exposure in shadowed lower areas
- Reverse gradients: Sometimes the waterfall is bright (top) and foreground is dark (bottom), which calls for a reverse gradient
This mimics physical graduated ND filters and helps balance exposure.
Local Adjustments
Selective adjustments on specific areas:
- Brush tool on waterfalls: Slightly reduce highlights and increase clarity on cascade sections
- Radial filter on focal cascade: Draw attention to the primary waterfall with subtle vignetting
- Adjustment brush on foreground: Enhance foreground elements (pools, rocks) to emphasize depth
Noise Reduction
Long exposures at low ISO typically produce clean images, but shadowed areas lifted significantly in post may show noise. Apply moderate noise reduction to these areas while preserving detail in important regions.
Sharpening
Apply sharpening carefully:
- Overall sharpening: Moderate amount (40-60 in Lightroom)
- Masking: Use masking (hold Alt while adjusting Masking slider) to apply sharpening only to edges, not smooth water or sky
- Detail sharpening: Increase detail on travertine textures and vegetation
- Output sharpening: Apply appropriate output sharpening for the final use (screen, print)
Common Mistakes to Avoid
- Over-saturation: Resist the temptation to over-saturate greens and blues. Natural colors look better.
- Over-smoothing water: Don’t process away all texture in the water. Some detail keeps the image real.
- Excessive HDR: Blending multiple exposures for dynamic range is fine, but overdone HDR creates unnatural halos and flatness.
- Over-sharpening: Too much sharpening creates harsh artifacts.
The goal is natural-looking images that represent what the eye sees while managing the camera’s dynamic range limitations.
Practical Information
Park Access and Entry Points
Main Entrance: Skradinski Buk entrance (most common) provides direct access to the main waterfalls.
Roški Slap Entrance: Less crowded alternative for visiting the second waterfall.
Other entrances: The park has several entrances, but Skradinski Buk and Roški Slap are primary for photography.
Tickets and Costs
Purchase online: Buy tickets in advance online to skip queues and guarantee entry during peak season.
Pricing: Varies by season (most expensive July-August, cheapest November-March). Check official website for current prices.
Includes: Entry ticket includes access to boardwalks and trails. Boat trips to Visovac Island cost extra.
Opening Hours
Opening hours vary by season:
- Summer (June-September): Typically 8:00 AM to 8:00 PM
- Spring/Fall: Generally 8:00 AM to 6:00 PM
- Winter: Reduced hours, check before visiting
Verify current hours on the official website as they change.
Facilities
Parking: Large parking lots at main entrances (fee charged separately from entry).
Restrooms: Available at entrances and within the park.
Food: Restaurants and cafés near entrances. Bring water for the boardwalk loop as there are no facilities along the trail.
Accessibility: The wooden boardwalks are wheelchair accessible in most areas.
What to Bring
- Camera gear (as discussed in gear section)
- Water and snacks
- Sun protection (hat, sunscreen)
- Comfortable walking shoes (you’ll walk 2-5 km)
- Light rain jacket (summer afternoon storms possible)
- Insect repellent (summer)
- Microfiber towel for wiping spray off gear
Park Rules
- Stay on designated boardwalks and trails
- Swimming is prohibited at Skradinski Buk (since 2021)
- No drones (prohibited in national parks)
- No off-trail hiking
- Respect wildlife and vegetation
- Pack out all trash
Getting There
Krka National Park is located:
- 60 km from Split (1 hour drive)
- 15 km from Šibenik (20 minutes)
- 90 km from Zadar (1.5 hours)
No public transport directly to the park entrances. Options:
- Drive and park at the park
- Organized tours from major cities
- Taxi from Šibenik
Suggested Photography Itinerary
For a full photography visit:
8:00 AM: Arrive at Skradinski Buk entrance at opening 8:00-10:30 AM: Photograph main cascades while boardwalks are quiet 10:30 AM-12:00 PM: Complete the boardwalk loop, photographing upper sections 12:00-2:00 PM: Lunch, review images, rest during peak crowds and harsh light 2:00-4:00 PM: Travel to Roški Slap entrance 4:00-6:00 PM: Photograph Roški Slap waterfalls in afternoon light 6:00 PM: Depart
This full-day itinerary captures both major waterfall areas in optimal light.
Key Takeaways
Krka offers some of Croatia’s most accessible and photogenic waterfalls. The extensive boardwalk system gives water-level access rare at major waterfalls, and the travertine formations build a kind of beauty you won’t find at simple rock cascades.
Successful waterfall photography at Krka needs technical mastery of long exposure technique with ND filters, strategic timing to arrive early and dodge crowds, an understanding of how to work within boardwalk constraints and seasonal awareness of how water levels reshape the waterfalls.
The key factors: arrive at park opening (8:00 AM) for empty boardwalks and soft light, master long exposure technique with ND filters for that classic silky water effect, explore the entire boardwalk loop rather than just the entrance area and consider Roški Slap for excellent photography with minimal crowds.
Most importantly, visit multiple times in different seasons and conditions. Krka transforms from powerful spring flows to delicate summer and winter curtains, each offering different photographic opportunities. Return visits reveal new perspectives on these falls.
FAQ
Q: What are the best camera settings for photographing Krka’s waterfalls?
A: After years photographing Krka’s waterfalls, I’ve settled on a reliable settings approach. For the classic silky water effect with long exposures: Aperture f/11 to f/16 for depth of field, keeping both close waterfall details and distant elements sharp; Shutter speed 0.5 to 4 seconds depending on the water smoothness you want and the light; ISO 100 for maximum image quality; ND filter (6-stop or 10-stop) to allow long exposures even in bright daylight. Krka’s boardwalks sit under tree canopy in many areas, which naturally cuts light, but during midday you’ll still need strong ND filters for multi-second exposures. For freezing water motion: Use 1/500s or faster shutter speed, f/5.6 to f/8 aperture and adjust ISO as needed (typically 400-800 in shaded areas). I prefer the long exposure approach for Krka’s cascades because it gives the ethereal, flowing look that emphasizes the water’s movement. Always use a sturdy tripod and remote shutter release to eliminate camera shake during long exposures. For best results, bracket exposures (-1, 0, +1 EV) since the bright white water and darker shadowed areas create challenging dynamic range. Shooting RAW is essential for recovering detail in both highlights and shadows during post-processing.
Q: What is the best time to photograph Skradinski Buk?
A: As someone who’s photographed Skradinski Buk dozens of times, I strongly recommend early morning arrival (7:00-9:00 AM) for the best photography conditions. The park opens at 8:00 AM in summer (7:00 AM in some months) and arriving at opening gives you several key advantages: virtually empty boardwalks for composition freedom without people in your frames, soft morning light through the forest canopy that hits the waterfalls without harsh shadows, calm air with less wind disturbing water surfaces and vegetation and cooler temperatures that make carrying gear more comfortable. By 10:00 AM, tour buses arrive and crowds build fast, which makes photography difficult. If early morning isn’t possible, late afternoon (4:00-6:00 PM) is my second choice. Crowds thin as people leave, and the warm afternoon light creates golden tones on the travertine and water. Avoid midday (11:00 AM-3:00 PM) when harsh overhead sun creates extreme contrast between bright white water and dark shadows and crowds peak, which makes boardwalk photography nearly impossible. Seasonally, spring (April-May) and fall (September-October) offer the best combination of good light, moderate water flow and fewer crowds than summer. Winter visits (November-March) give you a completely empty park with a different character from lower water levels, though some trails may be closed.
Q: Do I need ND filters for waterfall photography at Krka?
A: Yes, ND (neutral density) filters are essential for daytime waterfall photography at Krka if you want long exposure images with smooth, flowing water. Even though much of the boardwalk trail sits under forest canopy, bright Croatian summer days give too much light for the multi-second exposures you need for that classic silky water effect without ND filters. I carry both a 6-stop ND filter and a 10-stop ND filter, using them individually or stacked depending on the light. In shaded areas during early morning or late afternoon, a 6-stop ND (allowing 1-4 second exposures at f/11, ISO 100) often does the job. In brighter conditions or for very long exposures (15-30 seconds), I stack filters or use the 10-stop alone. Variable ND filters are convenient but can create color casts and X-patterns with wide-angle lenses, so I prefer fixed ND filters for best image quality. The technique: compose and focus without the filter attached, switch to manual focus so it doesn’t change, attach the ND filter, recalculate exposure (many phone apps do this automatically) and shoot using a remote release or 2-second timer. Cover your viewfinder during exposure to prevent light leaks. Without ND filters, you’re limited to very early morning or late evening for long exposures, which severely restricts your shooting window. ND filters are a small investment that dramatically expands your creative options for waterfall photography.
Q: Can you still swim at Krka waterfalls?
A: No, swimming at Skradinski Buk has been prohibited since January 2021 due to environmental protection concerns. For decades, Krka was famous for allowing swimming right beneath the waterfalls, a unique experience among European national parks. But the large numbers of visitors were causing ecological damage to the sensitive travertine formations and affecting water quality. The swimming ban was implemented to protect the park’s fragile ecosystem. This change has actually improved conditions for photographers. The waters are clearer without swimmers disturbing sediment, you can photograph the waterfalls without people in the water and the travertine barriers are recovering their natural appearance. While you can no longer swim at Skradinski Buk, swimming is still permitted at certain other locations within the park boundaries during summer months. From a photography perspective, the swimming ban is beneficial because it preserves the natural beauty we’re trying to capture and removes the challenge of timing shots between swimmers. The park remains impressive for photography even without the swimming experience, and the environmental protection ensures these waterfalls will keep photographing well for generations.
Q: How do I photograph waterfalls from Krka’s boardwalks?
A: Krka’s boardwalk system gives you excellent waterfall access but presents unique photography challenges. The boardwalks are wooden walkways at water level that circle Skradinski Buk, and the perspective keeps changing as you move around the complex. Key techniques I use: Arrive early (before 9:00 AM) when boardwalks are empty, since crowds make tripod use difficult and people in frames unavoidable later in the day. Use a sturdy tripod with a wide stance for stability on the wooden boardwalk surface, which can vibrate when other visitors walk past. I often wait for quiet moments between groups of tourists before triggering long exposures. Protect your gear from water spray. The boardwalks bring you very close to cascades where fine mist drifts onto your lens. Keep a microfiber cloth handy and use a lens hood. Explore the entire boardwalk loop. The circular route gives you 360-degree access to the waterfall complex, with different angles revealing different compositions. Some spots show multiple cascade tiers, others focus on individual falls and certain viewpoints look across pools toward distant cascades. Use wide-angle lenses (16-35mm) for full waterfall scenes showing the scale of the complex and telephoto lenses (70-200mm) for isolating individual cascades and creating abstract patterns of flowing water. The boardwalks put you at the perfect height for water-level perspectives that build an intimate connection with the waterfalls. This low angle emphasizes the power of the water and creates dynamic leading lines as cascades flow toward the camera.
Q: What is unique about photographing Krka compared to other waterfalls?
A: Krka National Park offers waterfall photography opportunities distinctly different from other famous waterfall locations. The key difference is accessibility and variety within a compact area. Skradinski Buk isn’t a single waterfall but a complex of 17 cascades spread over 800 meters, each with different character: gentle curtain falls, powerful channeled drops, wide stepped cascades and delicate side streams. The extensive boardwalk system gives access to water-level perspectives that are rare at large waterfalls, where you typically view from a distance. You can compose with foreground elements (travertine formations, pools, vegetation) leading to waterfalls just meters away. The travertine formations give Krka’s waterfalls a distinctive appearance. The golden-brown calcium carbonate deposits build natural sculptures, pools and barriers that shape the water’s flow. That gives you more varied compositions than simple rock waterfalls. The combination of waterfalls and cultural elements is unique. At Roški Slap, traditional stone watermills integrate human history with natural beauty, giving you compositions unavailable at purely natural waterfalls. The surrounding Mediterranean vegetation and climate create a different aesthetic than typically forested waterfall environments. The Krka River’s turquoise-blue color (from dissolved minerals) photographs beautifully, contrasting with white cascades and golden travertine. Finally, Krka’s waterfalls change dramatically with seasons and water levels. Spring brings powerful flows, summer shows refined travertine details with lower water, fall provides autumn colors and winter reveals the underlying travertine architecture. This seasonal variation means returning photographers find different subjects each visit.
Q: What focal lengths work best for Krka waterfall photography?
A: I use a range of focal lengths at Krka, each serving different creative purposes. Wide-angle lenses (16-24mm): Essential for capturing the full scope of Skradinski Buk’s cascade complex, showing multiple tiers and how the waterfalls relate to the surrounding terrain. Wide angles work brilliantly from the boardwalks, letting you include foreground travertine formations or pools while still showing the full waterfall behind. The slight distortion emphasizes depth and pulls viewers into the scene. Watch out for vignetting when using strong ND filters with ultra-wide lenses. Standard zoom range (24-70mm): My workhorse for Krka photography, offering flexibility to frame individual cascades, medium-width compositions and detailed sections without the distortion of wide angles. This range works perfectly for capturing 2-3 cascade tiers in a single composition, creating balanced images that show the waterfall’s structure without overwhelming detail. Telephoto lenses (70-200mm): Excellent for isolating individual cascade details, building abstract compositions of flowing water patterns and compressing perspective to show multiple cascade layers stacked dramatically. Telephoto lenses also let you photograph sections of waterfalls from a distance when boardwalk access is crowded or when spray makes close approach impractical. I often use 100-200mm for abstract waterfall images that emphasize patterns, textures and the graphic quality of flowing water. For a minimalist approach, you could photograph Krka effectively with just a 24-70mm, but the creative range from 16mm to 200mm gives maximum versatility for different compositions and approaches.
Q: How do I deal with crowds when photographing Krka?
A: Crowds are the biggest challenge for waterfall photography at Krka, especially at Skradinski Buk during peak summer season (July-August). My crowd-management strategies: Arrive at park opening (8:00 AM in summer, 7:00 AM some months). The first 60-90 minutes give you relatively empty boardwalks before tour buses arrive. This early window is key for tripod work and long exposures without people walking through frames. Visit during shoulder seasons (April-May, September-October) when visitor numbers drop significantly but weather and water flows remain good. Winter (November-March) offers completely empty park conditions, though some areas may be closed and water levels are lower. Use very long exposures (30+ seconds with 10-stop ND filter) to render moving people as ghostly transparent figures or eliminate them entirely. Anyone who stops to watch you photograph will appear in the image, but people walking through during the exposure effectively disappear. This technique works well on busy days. Explore the entire boardwalk loop thoroughly. Most visitors cluster at the beginning of the trail near the main entrance viewpoint, while sections farther along the loop have fewer people. Some of my favorite compositions come from less-crowded areas that most visitors rush past. Visit Roški Slap instead of or in addition to Skradinski Buk. This second major waterfall receives a fraction of Skradinski Buk’s visitors and offers excellent photography with much more solitude. Be patient and strategic. Identify your desired compositions early, set up and wait for gaps in the crowd flow. Most tour groups move together, creating brief windows of quiet between groups. Finally, embrace the human element when crowds are unavoidable. Sometimes including visitors in your images provides scale and conveys the popular nature of this place.
Final Thoughts
Krka National Park is one of Croatia’s most dramatic waterfall destinations and offers exceptional accessibility for photographers. The combination of powerful cascades, intricate travertine formations and extensive boardwalk access creates photography opportunities available at few other waterfall locations globally.
The challenges are real. Crowds during peak season, the need for technical mastery of long exposure technique and boardwalk limitations require strategy and skill. But the rewards justify the effort. Few places combine dramatic waterfalls, water-level access and the sheer variety of compositions available within Krka’s waterfall complexes.
Success takes preparation, technical skill, strategic timing and persistence. Arrive early for empty boardwalks and soft light, master ND filter technique for silky water effects, explore beyond the entrance area and return in different seasons to experience Krka’s transformations.
I hope this guide helps you capture the flowing beauty of Krka’s waterfalls. Whether you’re photographing the powerful spring cascades of Skradinski Buk, the cultural watermills of Roški Slap or the delicate winter curtains revealing golden travertine, you’ll find Krka offers some of the most rewarding waterfall photography in Europe.
The cascades are flowing. Get out there and shoot.
💙 Support My Photography Work
Enjoy these guides? Support me on Patreon to help create more in-depth photography content! 🙏
Contact me!